What is Metering Modes and when to use each mode!
Have you struggled a lot to learn shooting modes and autofocus modes?
Good news! You still have to learn other modes called metering modes!
When I was first learning about the camera settings, whenever I finished learning one, I found another set that also had to know its role in the camera.
In fact, I was enjoying everything I learned about photography because it's the field that I love.
Well, let's get back to our topic. Metering Mode.
All modern cameras have something called “Metering Mode,” also known as “Camera Metering,” “Exposure Metering,” or simply light metering.
Knowing how this measurement works, or what each of its modes does is important in photography because it helps photographers control exposure with minimal effort, and it also helps capture the best photos in unusual lighting conditions.
In this article, you'll find all about metering modes, and how you can use them in your photography.
Metering Modes
What does Light Metering mean?
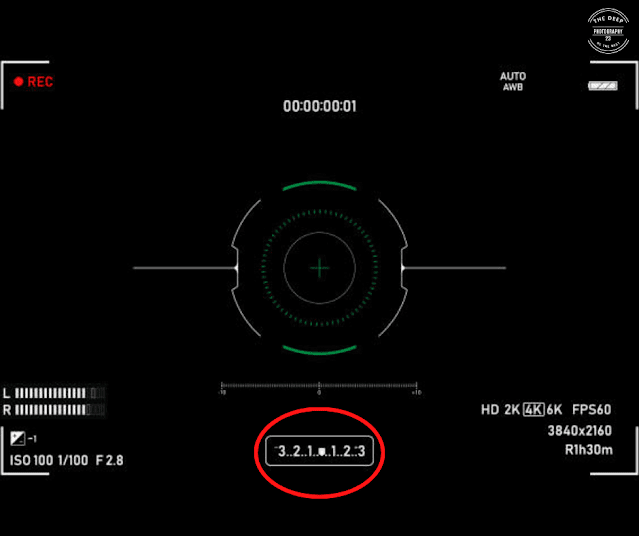
Have you ever noticed when looking through the Viewfinder, a small bar at the bottom of the screen that contains positive numbers and negative numbers with 0 in the middle?
This bar is called a photometer.
Cameras have photometers whose role is to measure the light in the scene, to determine the appropriate exposure for the image (exposure means the brightness of the image).
If the bar is at 0, the brightness of the image is appropriate.
If the bar is going to positive numbers like +1 then the image is overexposed (bright).
And vice versa, if the bar is toward negative numbers, the image is underexposed (dark).
When shooting in automatic mode (denoted by A, AUTO, or a green square in the modes dial at the top of the camera), the camera adjusts the three exposure settings.
Meaning that the camera is responsible for adjusting the three elements of exposure: aperture, shutter speed, and ISO to determine the appropriate exposure for the image.
In this mode, the camera always tries to leave the bar at “0” so that the image brightness is good.
In manual mode (denoted by M in the mode dial at the top of the camera), you adjust all three exposure settings. The camera does nothing but follows your instructions.
The light meter in this mode tells you whether the image brightness is adequate or not.
That is when you adjust the three settings you have to make sure that the bar is at 0. If it is in the direction of positive or negative numbers, you have to reset one of the three settings, or set the exposure compensation (all the information about exposure compensation in this article) to return the bar to “0”.
In semi-automatic modes, where you adjust one setting while the camera adjusts another, the light meter works in this case as well, because it measures the amount of light in the scene so that the camera can help you adjust the exposure.
But the light gauge in the camera may be wrong! How is that? This is what we will see in the next paragraph.
Does the light meter mismeter the light in the scene?
The camera's gauges work nicely and usefully in a scene that is evenly lit, meaning the same amount of light is on all sides of the scene.
But in scenes where the light levels and intensity are different, it becomes difficult for light meters to determine the exposure level.
For example, taking a picture of a blue sky without clouds or sun within the frame is easy for the camera scale, because there is only one light level to deal with correctly.
But if we add some clouds to the frame,
In this case, the photometer will need to assess the brightness of the clouds and the brightness of the sky at the same time in an attempt to determine the optimal exposure,
As a result, the light meter will increase the brightness of the sky a little so that the clouds can show their white color correctly, which will cause overexposure to the level of clouds in the image.
What would happen if we added a large tree to the scene. The light meter in this case will find that this tree is darker than the clouds and the sky, and will try to adjust the settings to get exposure in the middle between the lightness of the sky and the clouds and the darkness of the tree.
And finally, by default, given the light levels in the scene as a whole, it will try to reach an exposure that balances the light and dark areas of the image.
In the end, we will get poor exposure in scenes with different light levels.
How does a light meter get it wrong in dividing the light in a scene?
Good question.
When shooting a scene with different light levels, the photometer averages the overall brightness of the scene.
In the sense of balancing all light levels, it makes the elements of the image in the middle of the gray.
Medium gray is 18% gray and is exactly in the middle between pure white and pure black, as shown in the image below.
The camera's assumption that all elements of your image are in mid-tone, a kind of dull gray, is the main reason why we underexpose bright scenes or overexpose dark scenes.
Is there a solution to fix the light meter error?
Of course, there is a simple solution, but two solutions.
If you want your camera to take more accurate metering decisions to determine the correct exposure, you must either:
- Shooting with aperture mode (denoted by A or Av in the mode dial at the top of the camera), and manipulating exposure compensation, which you will find a detailed article about, and how to use it in this link.
Or simply know the measurement modes, so that you can choose the appropriate mode for the scene in front of you.
What is Metering Mode
Let's go to the gist of the article. Here, I'll explain what each of the camera's four metering modes does and how that affects your photos.
1. Matrix mode for Nikon and Evaluative mode for Canon
The Matrix metering mode and the Evaluative metering mode are the same, though the Nikon and Canon have a different names (also called Pattern on some cameras).
This mode is the default on most cameras.
The light meter takes a reading from across the scene. using this information, the computer in your camera performs many calculations, to determine the correct exposure using balanced highlights, mid-tones, and shadows.
One of the main factors this mode takes into account when deciding the appropriate exposure in a scene is where the camera focus point is set.
For example, I wanted to focus on a person on the side of the frame, and I set the focus point on this person so that he appears most clearly in the image.
After reading the information from all areas in the scene, the metering system looks at where you were focused within the frame and gives it the greatest importance among all the other areas.
You should use this mode for most of your photography, as it will generally do a very good job of setting the correct exposure, especially when shooting landscapes and portraits.
2. Center-weighted mode
Using the entire frame to determine the correct exposure is not always desirable.
What if you were trying to take a picture of the head of a person left behind by the sun like the one below?
This is where the center-weighted meter comes in handy.
The meter takes the light measurement from the middle of the frame and ignores the corners.
Compared to Matrix Metering, this mode does not look at the focus point you select and only evaluates the middle area of the image.
Use this mode when you want to capture the main subject in the center of the photo.
This mode works great for close-ups and relatively large subjects in the middle of the frame.
For example, if you're taking a picture of a person's head with the sun behind him/her, this position will show the person's face correctly, even though everything else is likely to be heavily exposed to light.
3. Spot Metering Mode
Spot Metering evaluates the light around your chosen focus point, calculates exposure based on just that individual area, and ignores everything else.
Personally, I use this mode a lot for shooting birds, because birds often take up a small area of the frame, and I need to make sure I'm displaying them correctly, whether the background is bright or dark.
Since the light is evaluated where I place my focus point, I can get an accurate exposure of the bird even when the bird is on the side of the frame.
Another good example of using this mode is when photographing the moon.
Since the moon will take up a small part of the frame and the sky is completely dark around it, it's best to use the Spot Metering mode. This way, we'll only look at the level of light coming from the moon and nothing else.
Some digital DSLR cameras such as Canon 1D/1D are capable of multi-point metering, which basically allows selecting multiple points of light metering and having an average value to get a good exposure.
4. Metering Partial mode
This mode is only available on Canon cameras.
Metering Partial mode calculates the exposure for the area in the center of the frame.
Meaning if you use this mode it will calculate the exposure for the area in the middle.
This mode is similar to the Center-Weighted mode, the difference is that Center-weighted mode calculates the exposure of the entire image from the center part.
But Partial mode only calculates the exposure for the middle area and ignores the rest of the image.
You can think of a partial measurement as an "extended" spot measurement. Because the area being measured is specific, but not small.
Partial metering is best used when your subject is excessively backlit, and you want a high-quality exposure to the subject.
How to change camera metering modes
Unfortunately, this varies not only from manufacturer to manufacturer but also from model to model.
On the Nikon D5500, for example, this is done through the menu setting (information button).
for more information click HERE
On professional cameras such as the Nikon D810 and Nikon D5, there is a separate button on the upper left dial for camera metering modes.
Metering on Canon cameras also varies from model to model but is generally done through a key combination (“Set” button), the camera menu, or a dedicated metering button near the top of the LCD screen.


Comments
Post a Comment
We are waiting for your comments and inquiries